|
 I am super excited to launch a new series of blogs where I interview successful e-commerce founders. This week we have the lovely Anushi Desai, co-founder of Plant Pops Snacks. Where did the idea for your business come from? Tell us how and why you get started. I’ve always been a foodie but I came up with the idea for Plant Pops after making popped lotus seeds at home (just like my grandmother and mother did) with some interesting flavour combinations and taking them into work for my colleagues. We used to work long hours and snack all the time, getting really bored of crisps and popcorn which is all that seemed to be on offer. Everyone loved the popped lotus seeds and that’s when we knew we were onto a winner! My friend Ash was the first to get hooked and he’s co-founder of our brand. We must have tested around 15 different flavours across hundreds of people to get to our starting line up of Himalayan Salt, Smoked Chilli and Peanut Butter Popped Lotus Seeds. Our mission is always to create snacks that are good for you, good for the environment and good for the communities that create them. Every pack sold helps us support Action Village India, a charity that supports farmers and their families in Northern India, from where we source our popped lotus seeds. What's a typical day like? Fortunately there’s no typical day! Although I’m working from home a lot more now, as are a lot of people, my day is super varied. I tend to focus on operations and products earlier in the day so I can liaise with our manufacturers. There’s lots of moving parts to look after so there really isn’t any typical day! 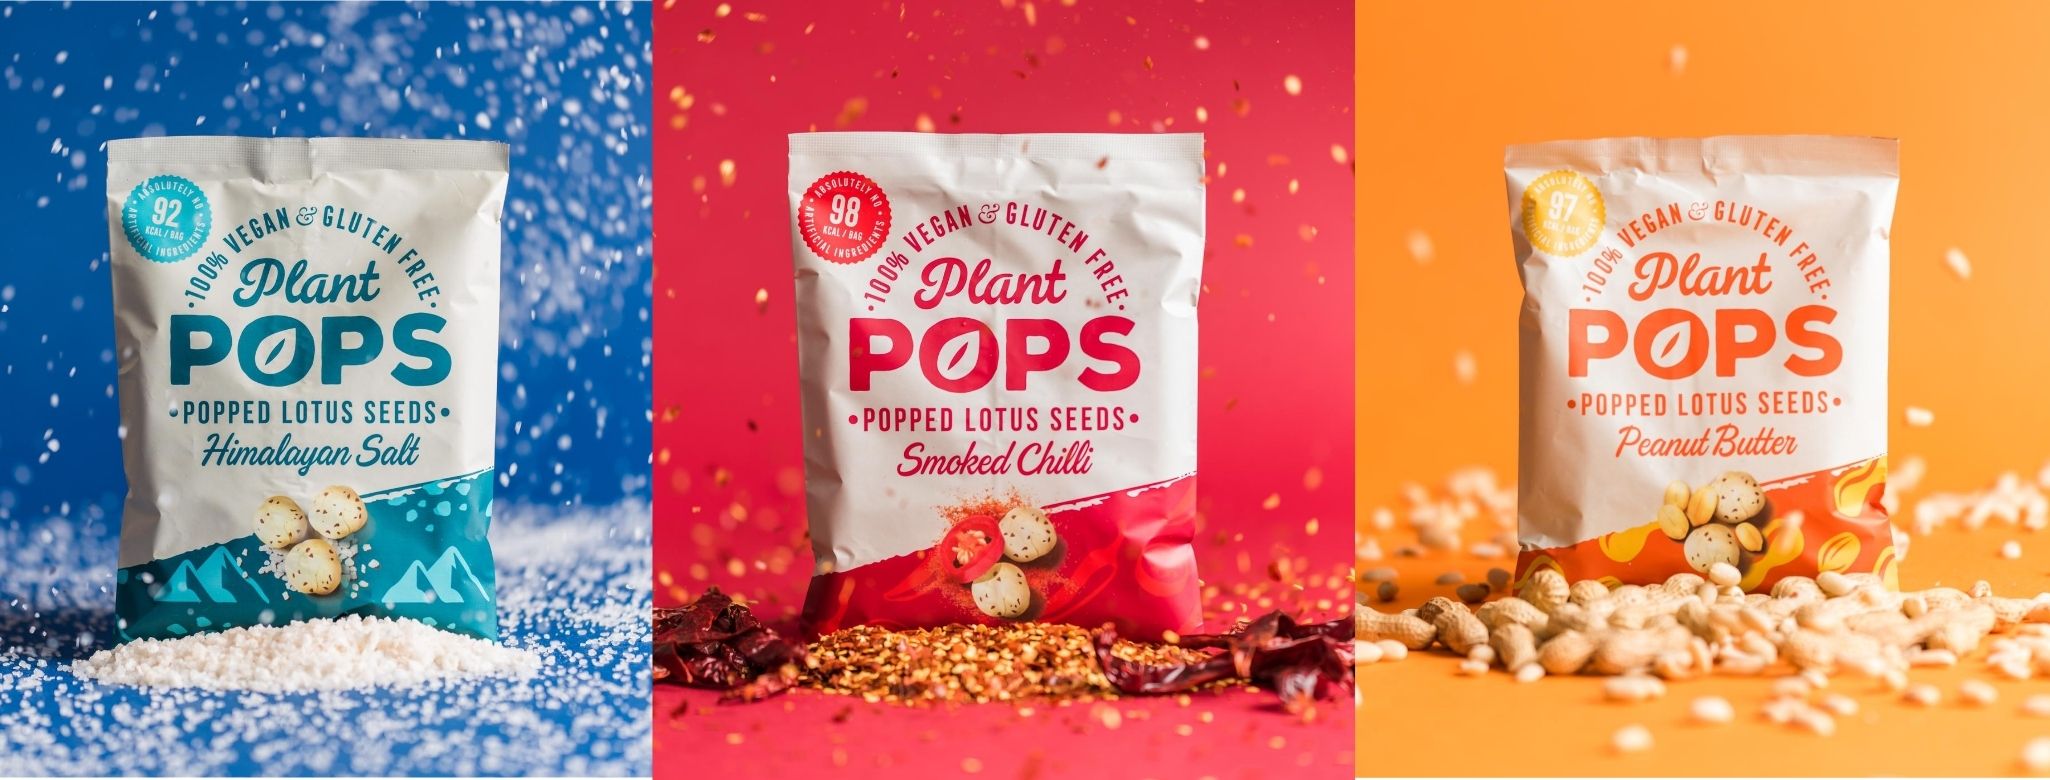 What is the best part of having your own business? I love being able to create something from scratch and see people enjoy it! I also love how flexible we can be and think of an idea, and put it into action within a couple of hours. One of my favourite things is sampling with our customers - I love hearing what they think, seeing them try a popped lotus seed for the first time and getting their thoughts on what they'd like us to bring out next. What's the hardest part? Sometimes running your own business can be a bit overwhelming - you've got so many different hats on that you have to upskill pretty quickly to make sure you're doing the right thing for the business at the right time. It can at times also be a bit lonely - running a start up in particular has some incredibly high highs and some really low lows. Every sale feels so great, but there are some challenges along the way too. 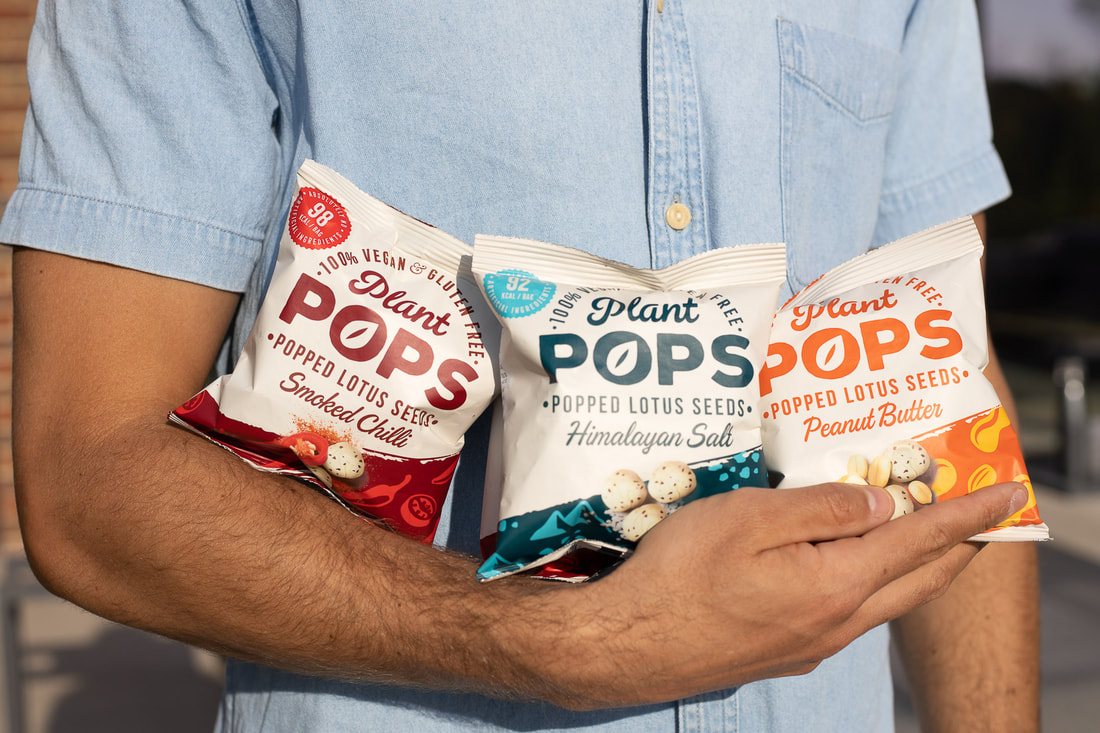 What’s your best selling product?
It really varies by platform – but our Peanut Butter is very unusual and our customers absolutely love it! If you had one piece of advice for someone just starting out, what would it be? I wish I’d been braver at the beginning - I second guessed myself a lot, and toyed with the idea of going forward with the business for at least 6 months. I wish I'd had the confidence in my idea and gone for it earlier. If you have an idea, you've tested the product-market fit, I would say just go for it! You'll never know until you try! Let's talk tech. Which softwares do you use in your business? ( Online store, email marketing, scheduling tools, video apps, accounting & banking apps etc). If you're on Shopify, I'd also love to learn your favourite apps. I use Notion pretty much ALL the time – I use it to make lists, track our stockists, sales, website updates and pretty much everything else through it. Later is great for scheduling content across our social media channels. I use FreeAgent for accounting and invoicing and all the boring bits! Which social media platform works best for you? Instagram is great to share visuals and really communicate with our audience. What business book/podcast/courses would you recommend? I love podcasts – some of my favourite business podcasts are PitchDeck and How I Built This. Where can people find you? You can find our Plant Pops through our website www.plantpopssnacks.com, Amazon and lots of great independent stores!
0 Comments
 There are only three ways to grow an e-commerce business. -Getting more customers -Getting more repeat customers -Increasing the average order value To be able to really understand how your online store is growing you need to measure certain KPIs and track these regularly. KPIs can feel confusing and overwhelming. But I promise the time and effort that you put into tracking them will pay off. The best way to do this checking your Google Analytics or e-commerce dashboard reports weekly. In this article, I would like to talk you through the most important KPIs that will help you increase your sales. 1.Traffic : When you look at your Google Analytics Dashboard, the traffic source will show you where your visitors are coming from for example, organic search, paid ads, social media or Google ads. It’s important to track New vs returning visitor For a new website, new customers will be higher. But for an established business, ideally there should be a 50/50 split. It’s always great to have returning customers, because you’ll have build trust with them and they will tend to spend more money with you. 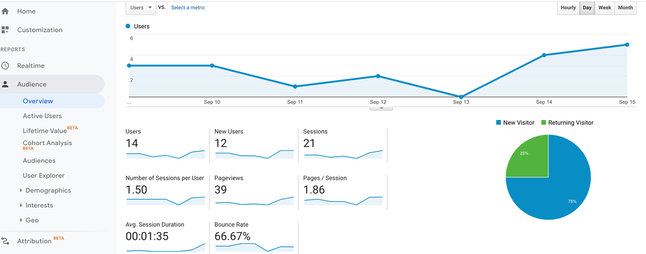 2.Bounce Rate: The bounce rate tells you how many users leave your website after viewing only one page. If your bounce rate is higher than 40%, you’ll need to investigate why visitors are leaving your website instead of exploring. High bounce rates also has a huge negative impact on SEO and paid traffic.
I strongly suggest you to check bounce rate of your home page as well as the bounce rate of the category and product pages. If you’re observing high bounce rates on any of these, then you can understand where the problem lies. 3. Average Order Value (AOV) Your average order value is the sum of the value of all of your orders (the total revenue for a period) divided by the total number of orders for that period. (You can see this in your Shopify dashboard) For example you might have 100 people spending an average of £10 or you might have 50 people spending £30. Trying to increase the AVO is easier than trying to acquire new customers. Therefore it's important to try and increase this value over time by upselling or cross selling other products. Generally speaking, having a higher AOV will help you run more profitable Facebook or Google ad campaigns. 4.Conversion Rate: To work out the conversion rate, divide the number of sales by the number of website visitors and then multiply it by 100 to get the percentage. Again if you've a Shopify website, you can see this KPI on your dashboard. Ideally you'd like your conversion rate to be a minimum of 2%. 5.Lifetime Value of the Customer is the overall revenue you forecast a customer to bring you during their lifetime, or span of time as your customer. This is especially important for subscription box business models. Because once you acquire that customer, as long as you keep them happy, they will stay with you longer, buying again every month. 6.Basket Abandonment Rate: Basket abandonment rate is calculated by dividing the number of completed purchases by the number of shopping baskets created. To turn the rate into a percentage subtract your number from one, and then multiply it by one hundred. Average basket abandonment rate for eCommerce websites is high, about 69 percent. If yours is higher, then you’ll want to look at the reasons why this is happening. Here are some common reasons why people don’t complete their checkout. -Unexpected delivery costs, -A complex check out process, -No Paypal or guest checkout option, -No info about return policy -Bad user experience I hope you find this helpful and if you need any more help understanding the data or how to optimise your website so that you can reach the optimum KPIs, just get in touch.  If you have been running Facebook ads for your online store, you might have come across the term "lookalike audiences''. In essence, these are audiences based on a specific data. For example, a lookalike audience of your website visitors, a lookalike audience of your purchasers, your Instagram followers and so on. Thanks to Facebook's sophisticated algorithm and pixel, we are able to tell Facebook to find us people who look like people who visited our website or who purchased from us before. These type of audiences can be highly lucrative and can help create highly profitable Facebook ad campaigns. What works really well is stacking up these well-working lookalike audiences and creating a super lookalike audience. Let's look at how we can create these. To create lookalike audiences, you first need to create custom audiences in Business Manager. 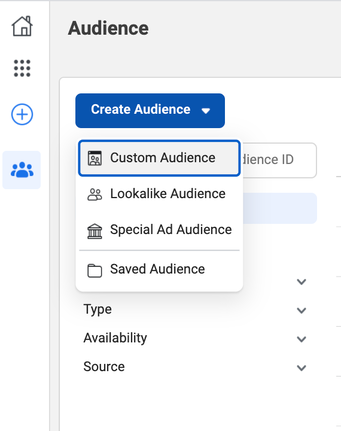 As you can see, there are 12 options to create custom audiences (not all are applicable for e-commerce). 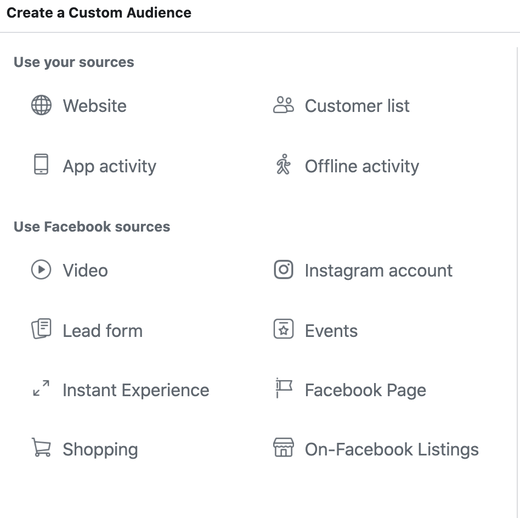 Here are the custom audiences that work well for e-commerce. -Website -Customer list (email database) -Video -Instagram Account -Facebook Page -Shopping Lookalike audiences only work well if you have a good quality of seed audiences. Let's look at these in detail. 1. Lookalikes of custom audiences based on website data : You can create custom audiences based on your Facebook pixel data, ninja targeting people who have completed different conversion events on your website. You want to focus on high-intent conversion events such as purchase and add to basket. You can also create a value-based lookalike audience if you have enough purchasers. 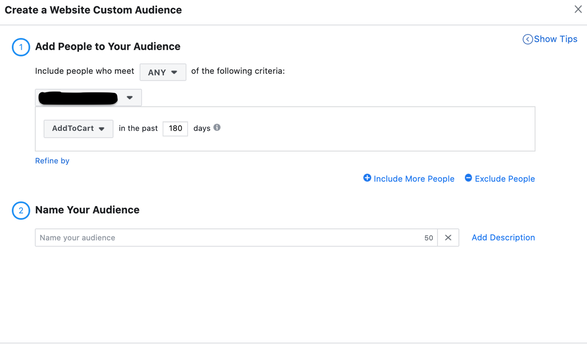 Once you have created a custom audience, then you can create a lookalike of it. As mentioned, Facebook can prompt you to create a value-based audience. You can then select the location and the size of the audience. A 1% lookalike audience will be most similar to the seed audience. 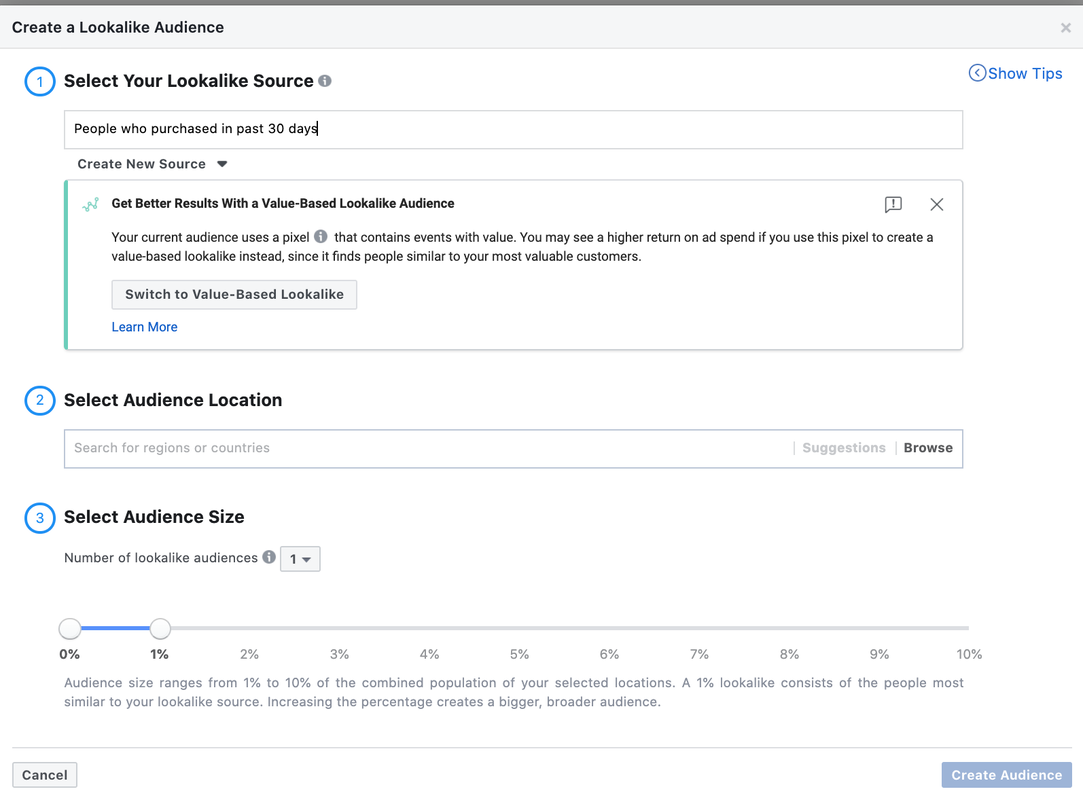 2. Lookalike of social engagers (people who engaged with your business on Facebook and Instagram) Facebook allows you to create various audiences off of your Facebook and Instagram audiences. I always choose people who engaged with any post or ad as that gives me a bigger audience. Here is how to create these custom audiences in Business Manager. Once you create these, then you can create lookalikes of these custom audiences. 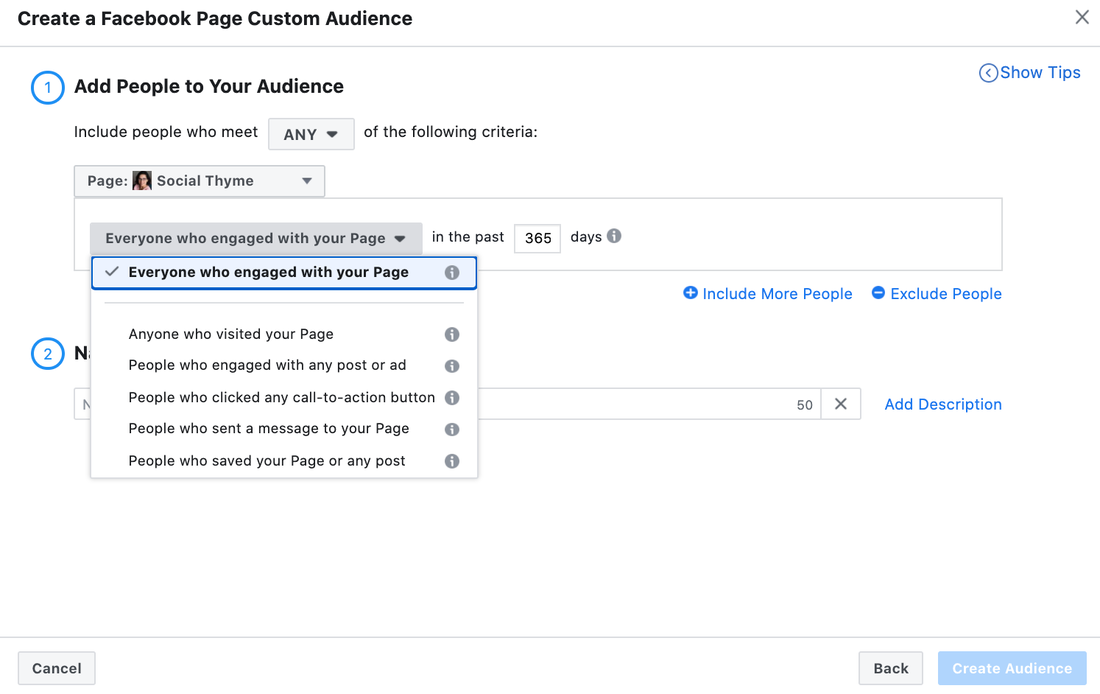 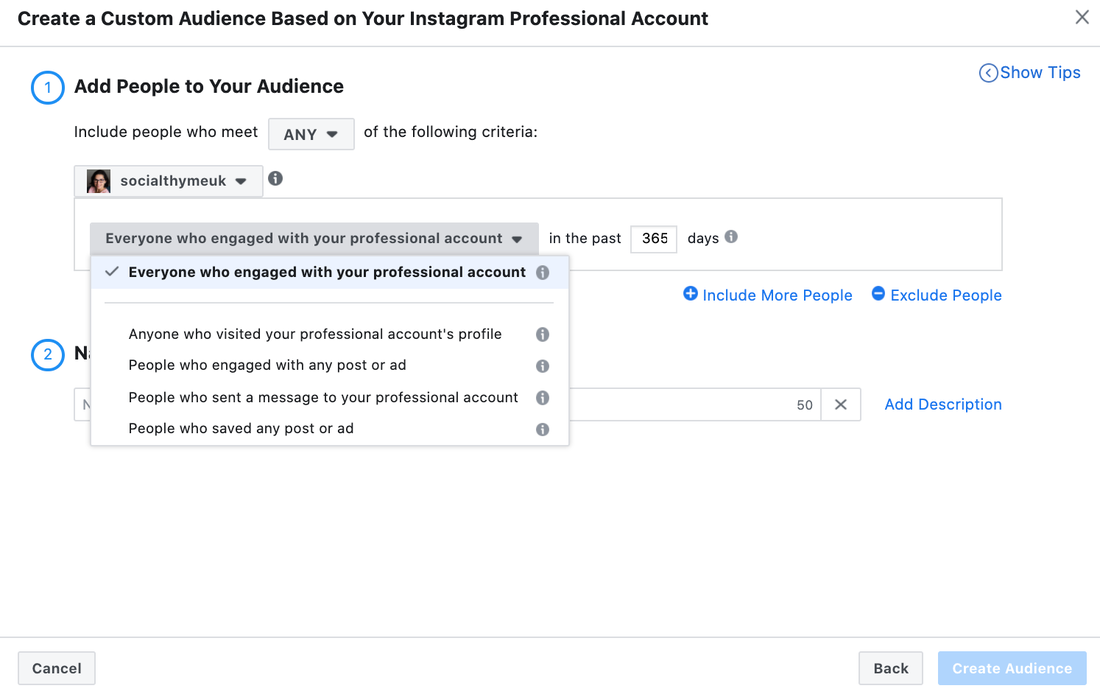 3. Lookalikes of your e-mail list: Have you been building up your e-mail list? Great! You can upload your it to Facebook and create a lookalike of this audience. 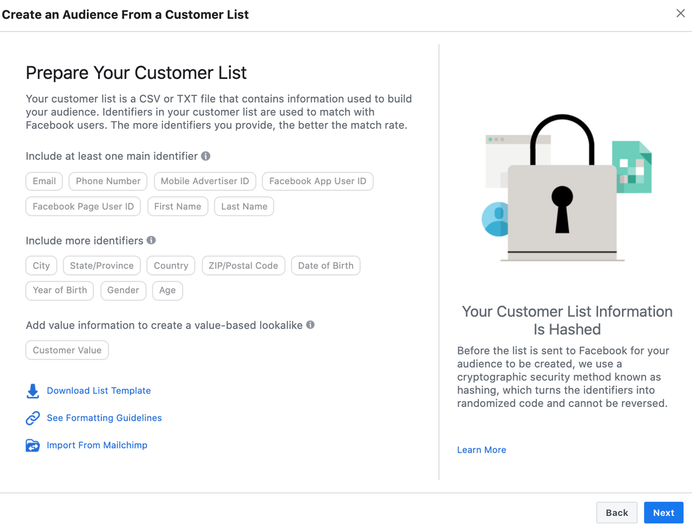 4. Lookalikes of video viewers: If you are regularly publishing video content and getting high engagement from these videos, then this can also be a great targeting option. I would suggest choosing people who watched at least 10 seconds of your video or at least 50% of your video as this indicates they are more interested in what you have to say. 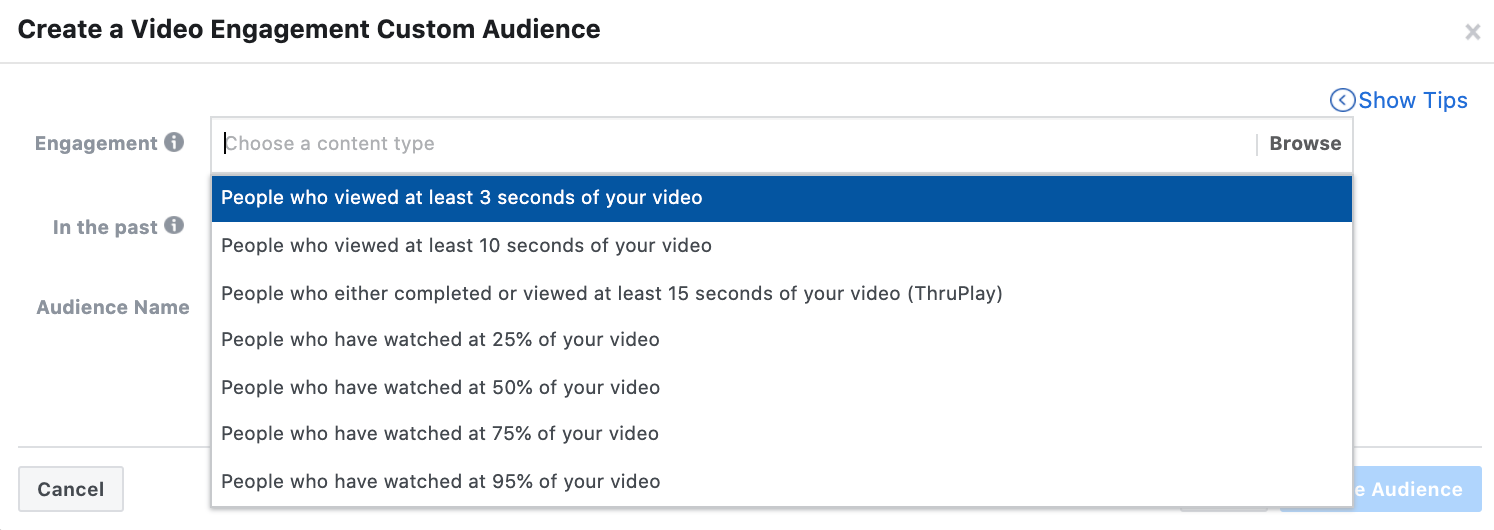 Once you have created your most valuable lookalike audiences, you can stack them all up and create a super lookalike audience. For example, you will have a lookalike of past purchasers and lookalike of Instagram and Facebook engagers in one campaign.
There may be some audience overlap but if you use CBO, Facebook will take care of it so you don't have to worry about the overlap. You can also test different lookalike percentages and different locations (if you are targeting other countries) which will help you scale your advertising campaigns for your ecommerce store. Superlookalike audiences have worked really well for my clients' ad accounts. Have you tried using them in your campaigns? Don't forget to subscribe to my email list to receive my FREE guide to learn what Facebook ad mistakes you might be making or alternatively, if you have an e-commerce business, join my Facebook group to chat all things Facebook & Instagram marketing. Need expert support? Apply for a free discovery call. 
A few weeks ago Instagram Reels was officially launched in over 50 countries. Reels allow users to create 15-second videos with short audio clips.
It is a fun and engaging way to increase your reach which will help you grow organically. If you are using Facebook ads, you'll also be able create audiences from people who watched your Reels. Currently Instagram is really prioritising Reels. Brands that are active on TikTok have jumped on the band wagon straight away. I have seen a lot of Reels from fashion and make up brands but not so much from others. If you have been feeling a bit overwhelmed about the whole thing and not sure about how to use it for your e-commerce business, here are some ideas to inspire you. 1.Educate your audience
Use Instagram Reels to educate and inspire your audience. In this Reel, Look Fantastic is giving some great tips about contour.
2.Share behind the scenes
Followers always like to see behind the scenes. Whether it's your production or packing, it's always interesting to watch. Soli and Sun does a great job with her Reels.
​I enjoyed watching this fun Reel by The Kind Co.
A Reel by Riverford showcasing a novelty fruit that they grow in their farm.
3.Give your followers a peek inside your studio or new shop, showroom etc.4.Show and tell
Show your product and talk about its features. What is its USP? How do you help your clients solve a problem?
5. Answer FAQs
What a clever and engaging way to answer frequently asked questions. I loved Emmy's Cookies Reel.
6. Showcase the details and textures of your products
These close up videos really make the products stand out.
7. Make a Reel to launch a new product
Here is a good example from Nutribullet.
8. Get them excited about an upcoming day9. Give a shoutout to other brands
A great Reel by Mustard showcasing their own product as well as others in the same colour.
10. Get creative and have fun
What better way to connect with your audience using music ? The possibilities to express your creativity has no limit and I really enjoyed watching this one.
I hope you find these ideas useful. As you can see there are lots of ways you can use Reels to promote your online shop and products. If you have seen any other interesting Reels, please let me know in the comments.
Don't forget to subscribe to my email list to receive my FREE guide to learn what Facebook ad mistakes you might be making or alternatively, if you have an e-commerce business, join my Facebook group to chat all things Facebook & Instagram marketing.
Need expert support? Apply for a free strategy call. 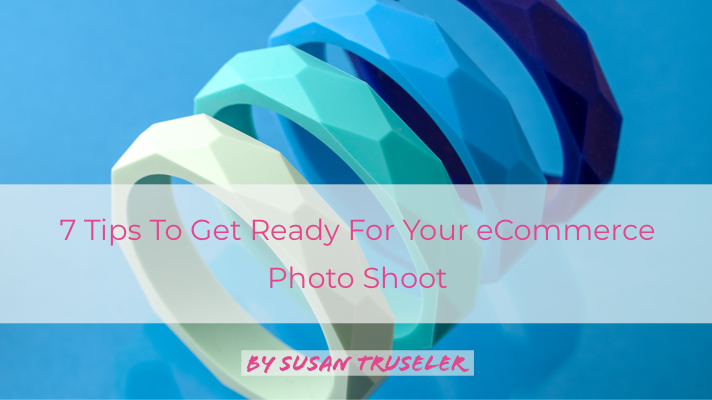 A set of professional photographs will make your products stand out online and a little planning will make sure you get all the beautiful images you need from your product photo shoot. Here’s how to get ready for your product photography. 1. Work with a professional photographer  Yes, you can take your own product photos. But styling, shooting and editing eCommerce photography are probably not your superpowers. And as a small-business owner, you already have a-million-and-one other things to do. Hiring someone to take your photos for you will save a huge amount of time and stress. When you’re choosing a photographer, look for someone whose portfolio makes you feel really excited about working with them and whose style really fits your brand. Ideally you want to find a photographer who specializes in product photography. 2. Brief your photographer  Once you’ve chosen a photographer, it’s time to talk to them about what you need. Let them know what you want your images for. Will they be using them for your website? An eCommerce site, your social media feed, or a combination of all of these? A good photographer will work with you to make sure your images are formatted and sized for your chosen platforms. Get clear on price, how many images you’ll get and when, and how you’ll receive them. Ask your photographer if they offer a remote product photography service (like my Send & Shoot), to save you the time and hassle of having to be at the studio all day. With remote photography, you simply send the photographer your products; they style, shoot and edit your pictures; and then send your products back to you. Once you’ve got the basics sorted, it’s time for the exciting part - styling your shoot. 3. Style your shoot  Start looking online for inspiration. Check out your photographer’s portfolio, look at your competitors’ images, pay attention to what stands out on your Instagram feed, and go wild on Pinterest. Start a Pinterest board with your favourite style elements from all the images you like - think about colour, props, backgrounds, and compositions. To get you started, take a look at my Product Photography Ideas Board. It’s also really useful to gather together the images and elements you don’t like. This will help your photographer hone in on your particular style and avoid anything that doesn’t fit your brand. 4. Choose backgrounds for your photos 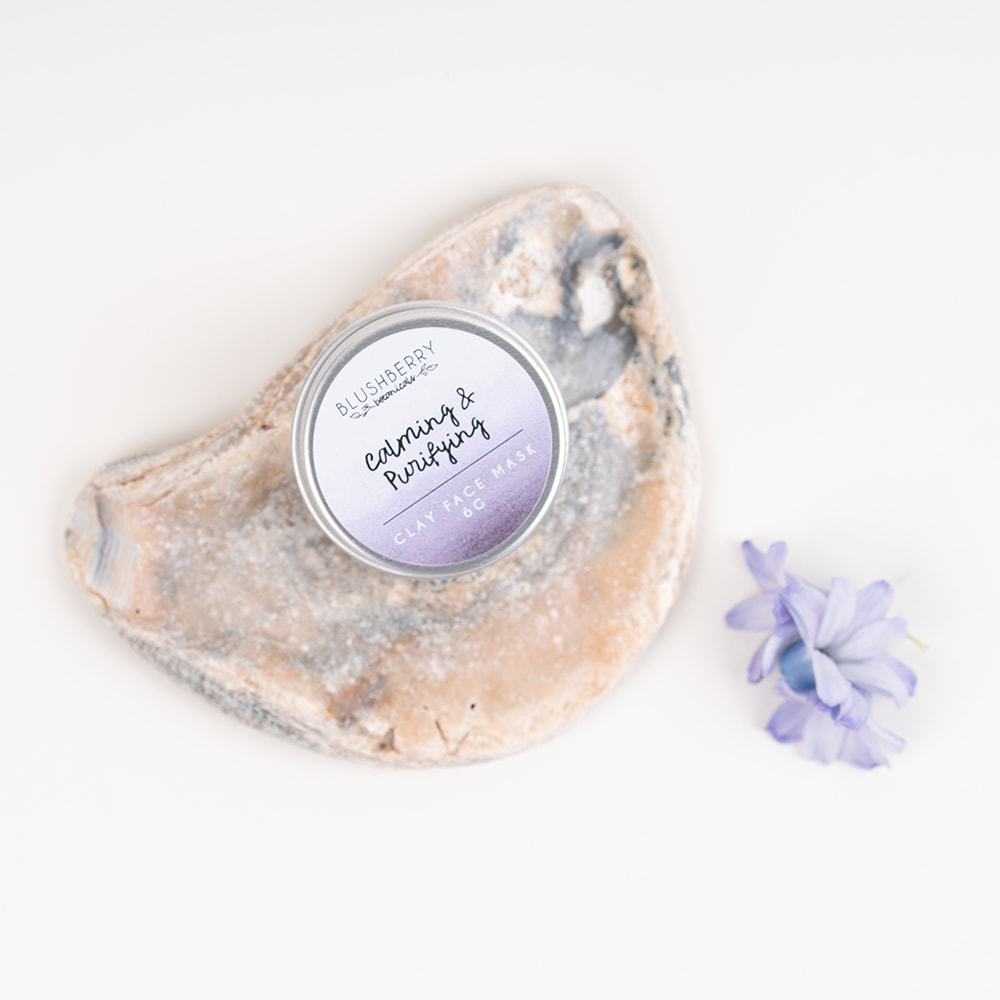 Your photographer will style your products on top of or in front of different backgrounds - a range of coloured or textured surfaces. They’ll have a number of backgrounds in their studio for you to choose from. And a good professional will also be very happy to source something special for you, if you give them plenty of notice. Play with incorporating your brand colours into your background. And ask your photographer for their ideas on what will work with your products. 5. Select the Right Props 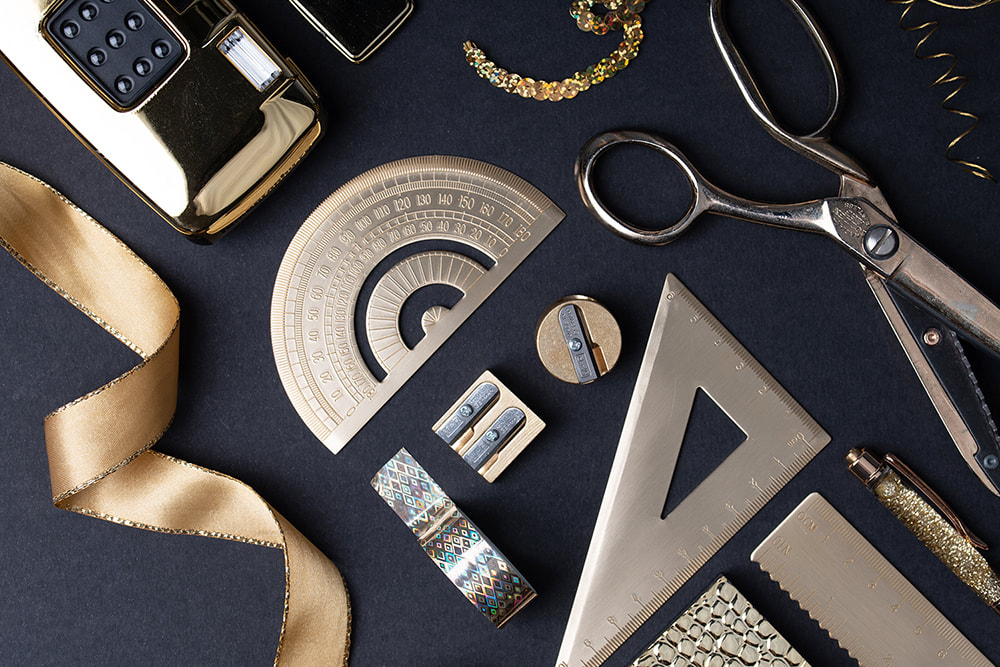 The right props add touches of your own personality and style to your photographs. They also help to tell the story of your products, giving them context and helping customers imagine how they’ll use or enjoy them. The idea isn’t to overload your images with too much stuff. But to add one or two elements that will enhance your shoot. Look around your home and studio for any props you’d like to include and think about what works with your brand. And talk to your photographer about the props they have already or could source for you. 6. Create a shot list 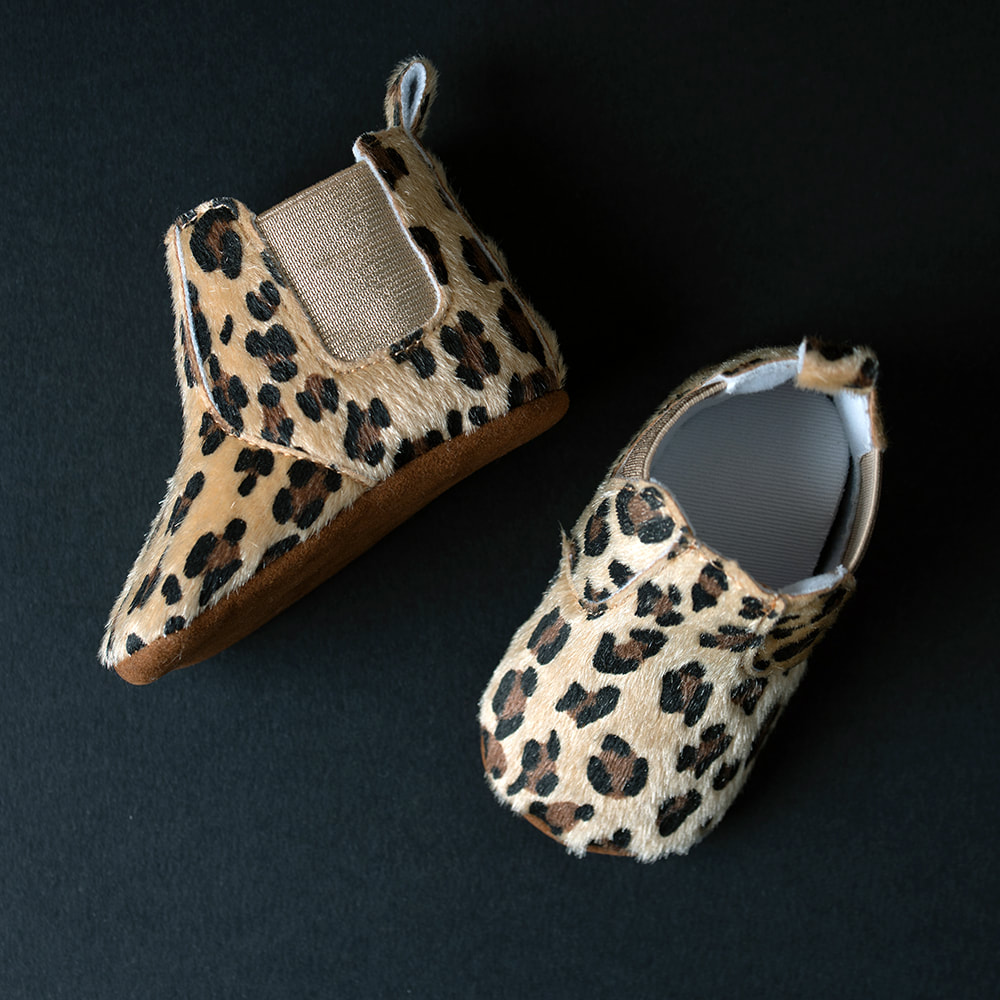 A shot list is a list of the individual shots you want your photographer to take of each of your products. It helps them be more efficient with their time. And makes sure you get the pictures you need. Use your shot list to specify which products are in each shot, the camera angle, the background and props you’d like included, and other styling you’d like to see in the photograph. You can download my FREE Product Shot List to get a good idea of what to include and to start planning your shoot right now. 7. Get your products and props ready 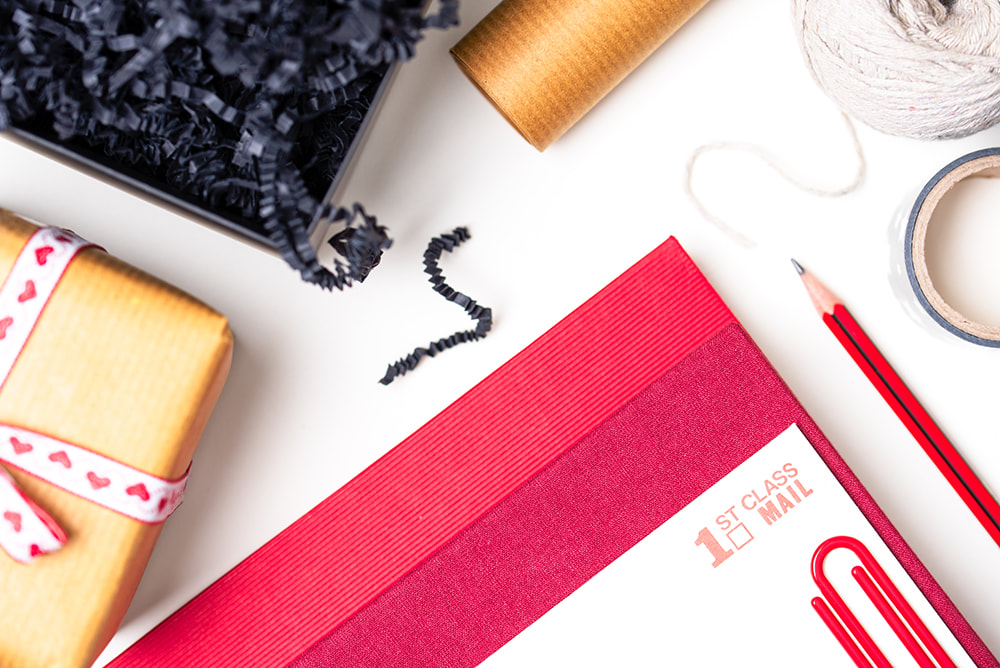 With your shot list in hand, it’s time to get your products and props ready for the big day. Go through your handy shot list and make sure you’ve got everything you need to create the photographs you want. If you want to show multiples of some products in the same shot (or the front and the reverse of an item), make sure you give your photographer enough products to do that. Get together any props you’d like to include too. Then all that’s left to do is package up and send your products and props to your remote photographer, or take them along to the studio. Planning and preparing for your photo shoot means you’re sure to get all the beautiful images you need. And getting creative with your styling is a lot of fun! Don’t forget to download my FREE Product Shot List so you can get started with planning your shoot. And if you get stuck for ideas or if you have any questions about my Send & Shoot service, you can book a FREE call with me to see how we could work together. Don't forget to subscribe to my email list to receive my FREE guide to learn what Facebook ad mistakes you might be making or alternatively, if you have an e-commerce business, join my Facebook group to chat all things Facebook & Instagram marketing.
Need expert support? Book a free discovery call. |
Archives
November 2021
Categories
All
|
 RSS Feed